Adding a New Store Location
If you are defining an agency that has several store locations and you want to have those locations searchable by zip code, you can add the store locations under the Store Locations (Searchable) section of the Agency Home page. Perform the following steps to add a new store location.
- Navigate to the Agency Home Page by clicking the link for an associated business on the Agency Listing page. The Agency Home Page for that business appears.
- Click the Add New button under the Store Locations (Searchable) section of the Agency Home Page. The Store Location (Searchable) page appears as shown below.
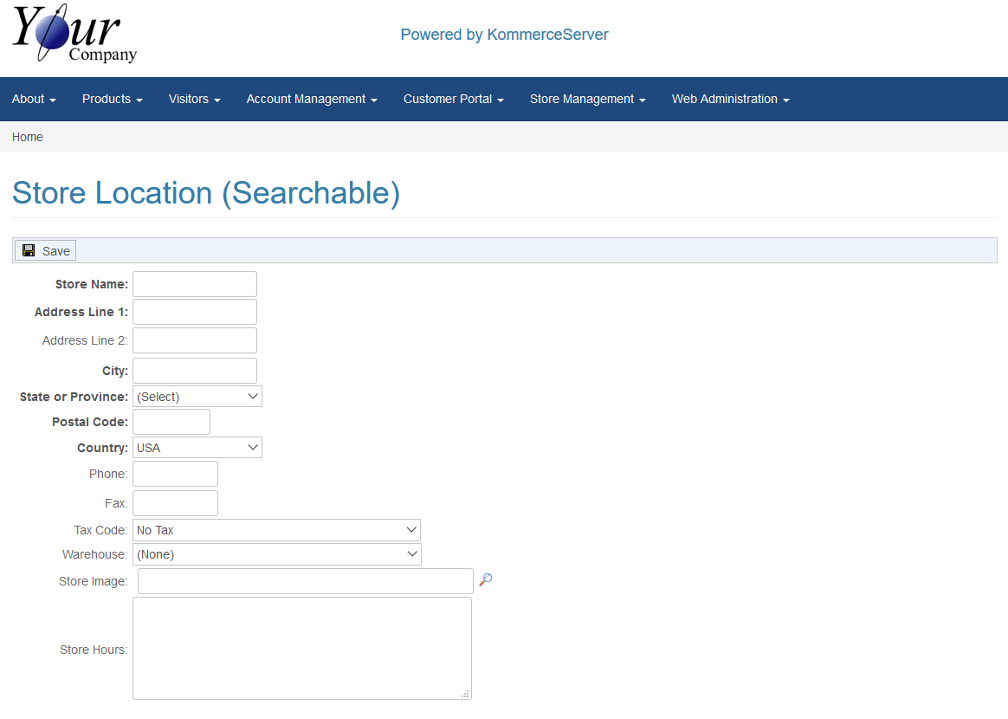
- Enter a name for the store in the Store Name field.
- Enter an Address for the store in Address Line 1 field.
- If necessary, enter a second line for the address in the Address Line 2 field.
- Enter a city for the store in the City field.
- Select a state or province from the State or Province drop-down menu.
- Enter a postal code in the Postal Code field.
- Select a country from the Country drop-down menu.
- Enter a phone number for the store in the Phone Number field.
- Enter a fax number in the Fax field.
- Select a tax code for the city the store is located in from the Tax Code drop down menu.
- For inventory type agencies, select a warehouse from the Warehouse drop-down menu. This enables this location to be seen when displaying branch level availability in the online store for products.
- Click the Search icon next to the Store Image field to select an image for your store.
- Enter the store hours in the Store Hours field, if desired.
- Click the Save button to save your store location information.